Table of contents
Some fonts are generic like Times New Roman and sans-serif. These fonts do not need to be defined in a project because they are available on all Operating systems (OS). They are some fonts that are available on a particular OS but are not available on another OS. An example is font Avenir. Avenir is a default font in macOS but not available in Windows.
Custom fonts solve this issue thereby giving a developer the ability to control the typography of a project by defining and specifying font families.
Local font file
Most times, font files are in ttf, otf and svg format.
.ttf for TrueType Fonts
.woff for Web Open Format
.otf for OpenType
In order to be able to use the local font files, you have to define the fonts using the @font-face { ... } CSS rule.
For example, you have the font Avenir file to use in our project. You will define the font like in the example below.
@font-face {
    font-family: 'Avenir';
    src: url('../path-to/Avenir.ttf') format('ttf');
}
After defining it, the font is now available for use in the project. You can use it anywhere in the project using CSS.
p {
    font-family: Avenir;
}
Or as TailwindCSS arbitrary value:
<p class="font-[Avenir]">Lorem ipsum dolor sit amet, consectetur</p>
If you want the font to be available as a utility class, you will have to define the font utility class in the tailwind.config.css file.
const defaultTheme = require('tailwindcss/defaultTheme')

module.exports = {
  theme: {
    extend: {
      fontFamily: {
        'sans': ['Proxima Nova', ...defaultTheme.fontFamily.sans],
        'Avenir': ["Avenir", "sans-serif"]
      },
    }
  }
}
This way, you can use the Avenir font utility class all through the project.
<p class="font-Avenir">Lorem ipsum dolor sit amet, consectetur</p>
In cases where you have multiple font files for Avenir, like AvenirBold, AvenirMedium, AvenirBlack.
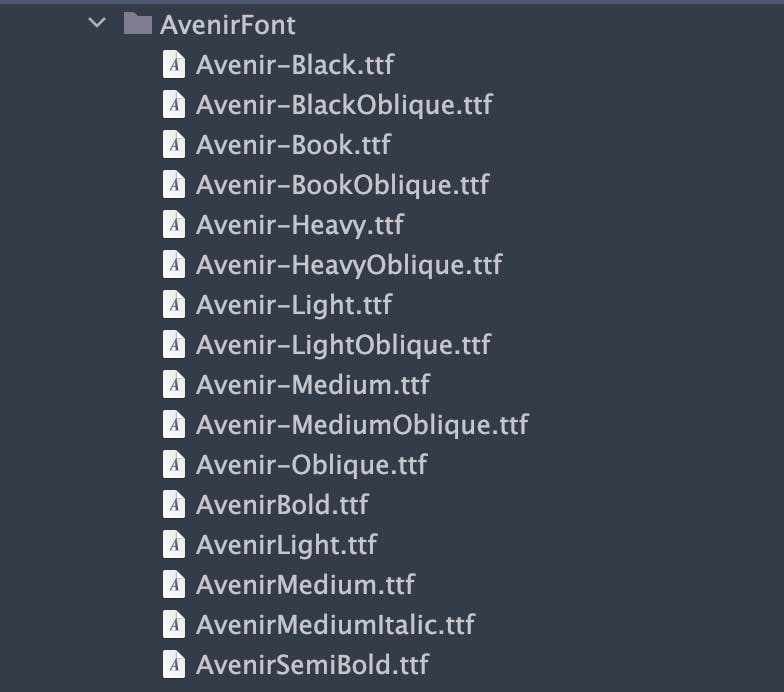
Use multiple font-face to define all the available variants of Avenir font, and give them the same family-family nameAvenir.
@font-face {
    font-family: 'Avenir';
    src: url('../path-to/AvenirBold.ttf') format('ttf');
}
@font-face {
    font-family: 'Avenir';
    src: url('../path-to/AvenirSemiBold.ttf') format('ttf');
}
@font-face {
    font-family: 'Avenir';
    src: url('../path-to/AvenirNormal.ttf') format('ttf');
}
With this, the Avenir font will be available in the project. Whenever you define a font-weight the corresponding Avenir font variant will be applied to the element.
Like if you specify font-semibold, it is the AvenirSemiBold font that will be applied to the element.
Using this method, you can define custom fonts in any project even if the project is not using TailwindCSS. TailwindCSS adds an extra feature like utility class and arbitrary values for you to use in styling elements.
Google fonts
Google font provides a CDN for a selected google font family so that the font can be imported into a project. This enables us to import single or multiple fonts into a project.
With Google font, you can select up to 5 fonts and you will get a code to paste into the section of your HTML to import the font.
Example: If you want to use Poppins, Inter and Allura fonts.
First, go to Google font site, search for the fonts and select the fonts. Let's start with the Poppins font.
Search and Select Poppins, select the font weights and styles you want.
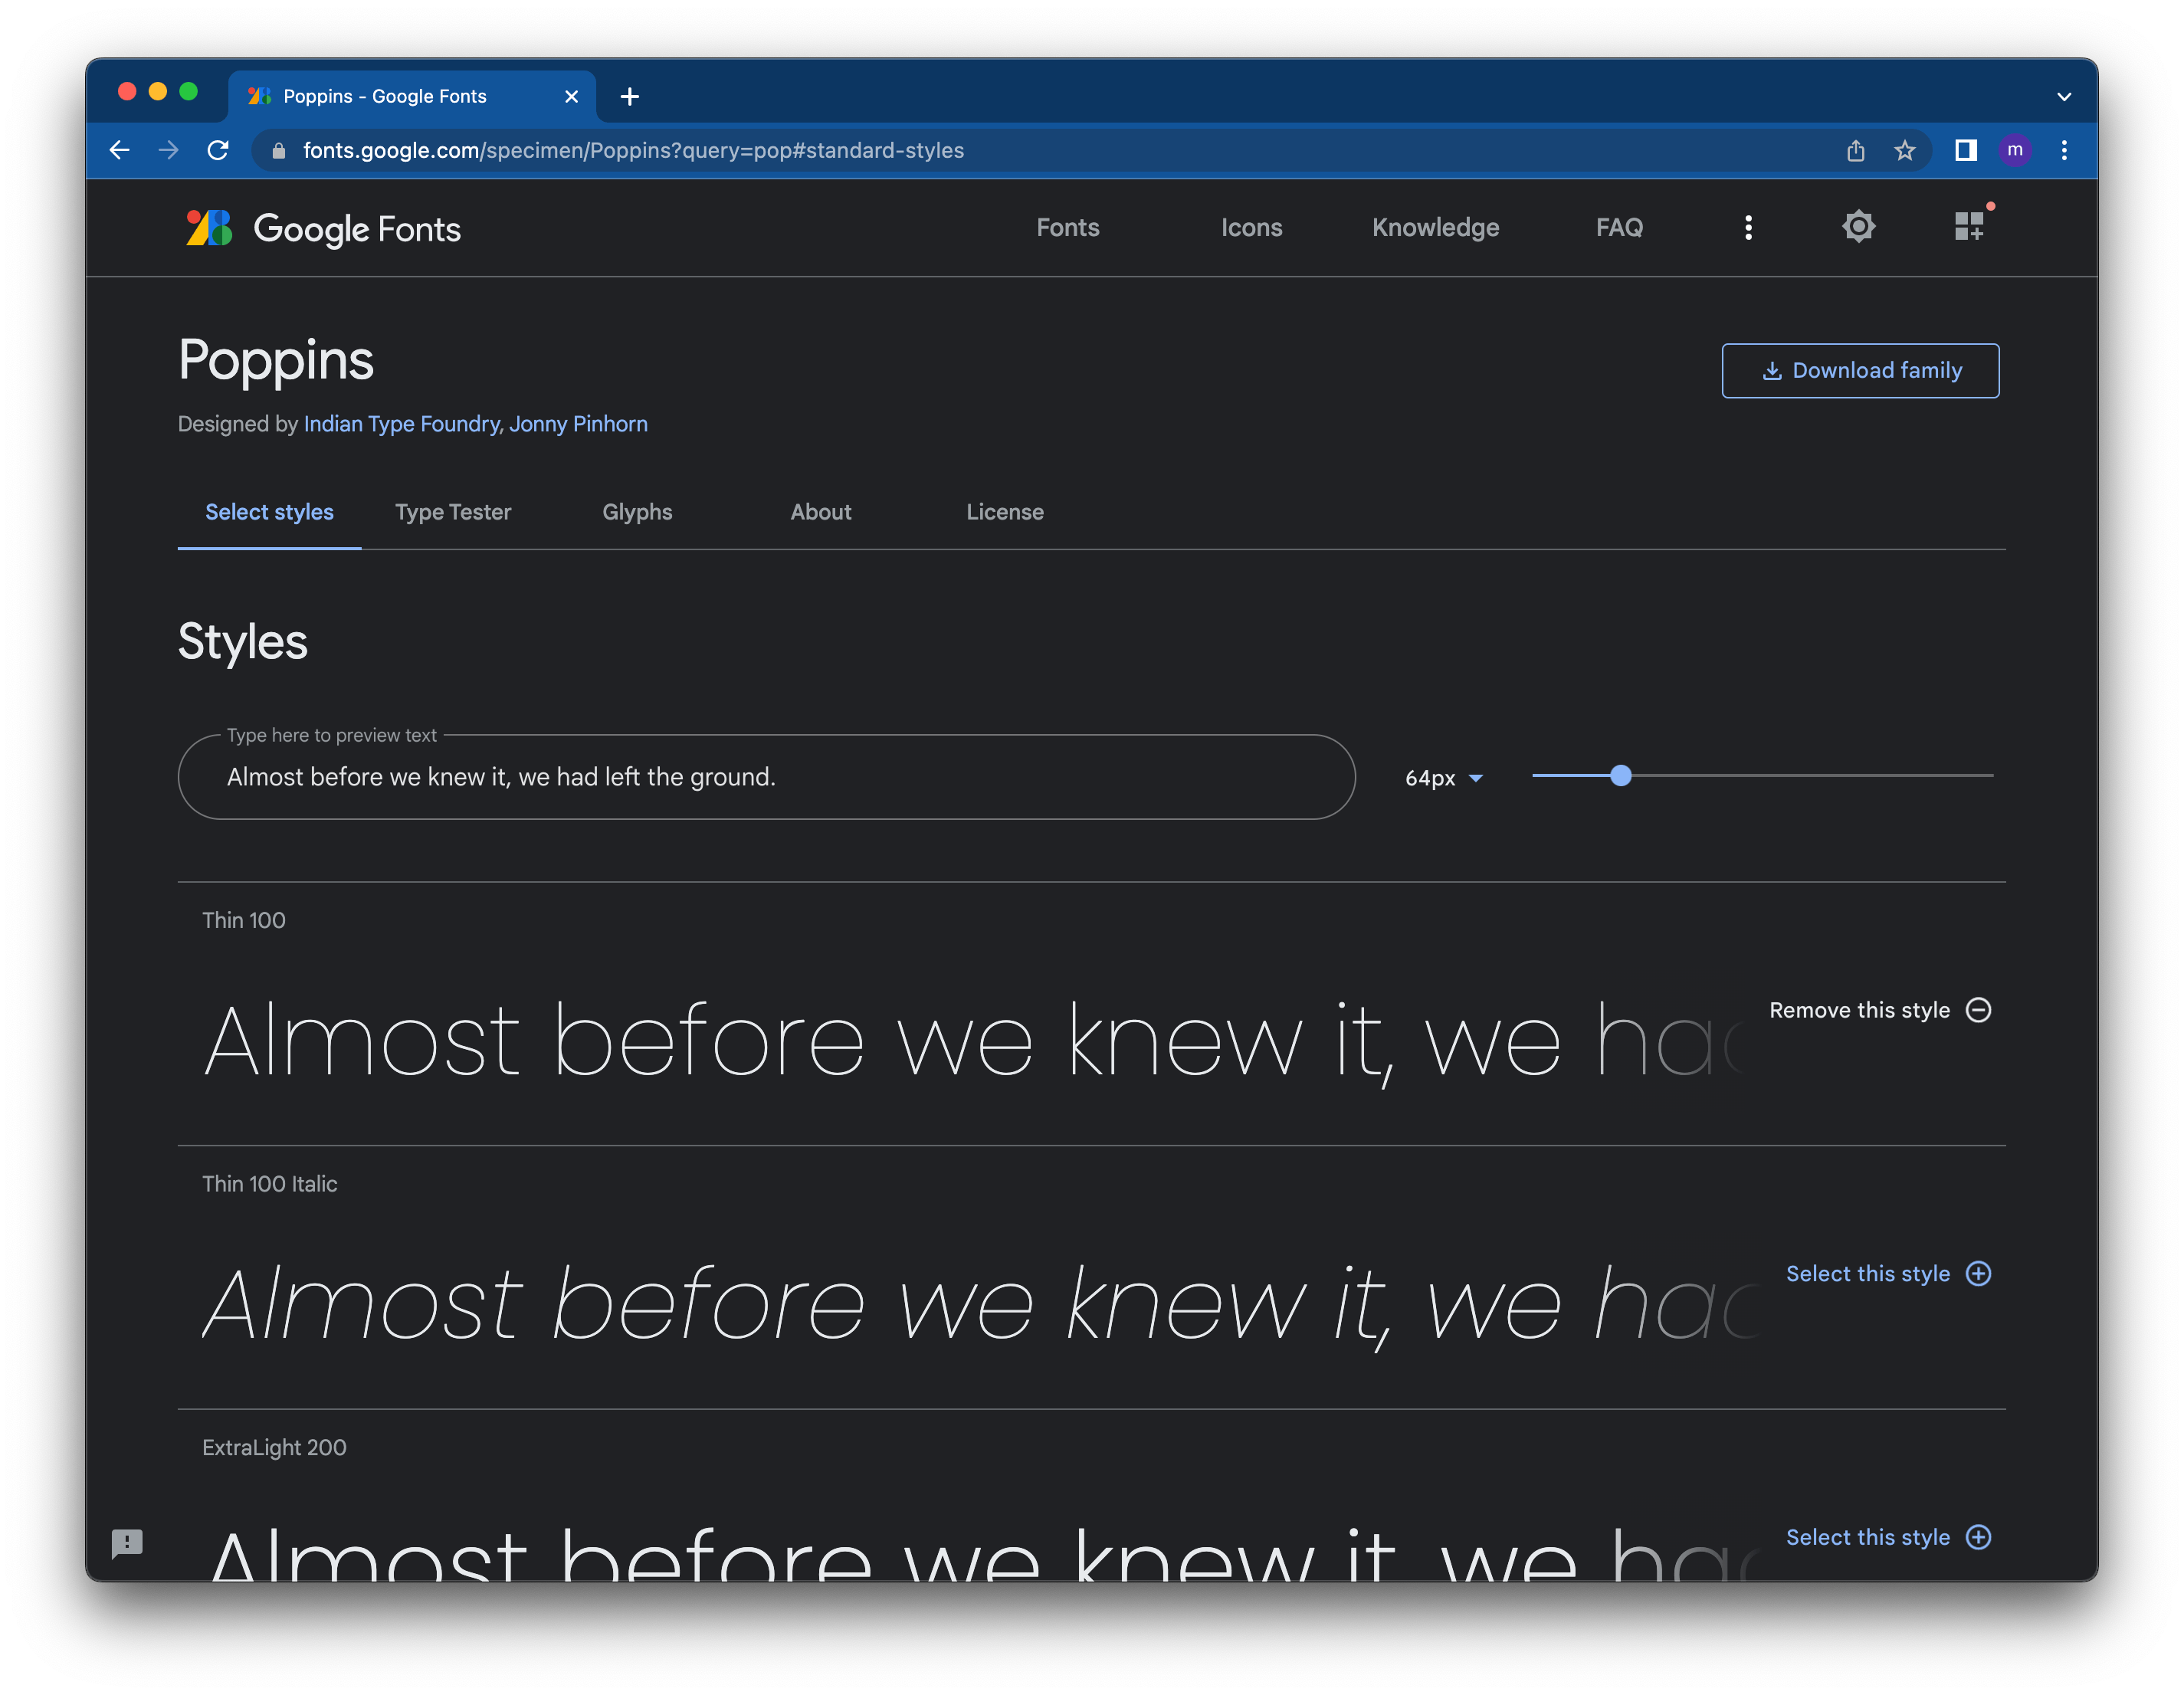
The Sidebar shows you the selected font weight and styles. Then you will get a generated code in the form of a link to paste in your HTML <head> section or an import code, to import in the <style> section or CSS/SCSS file. Added to this is a CSS rule to specify the font family of your HTML elements.
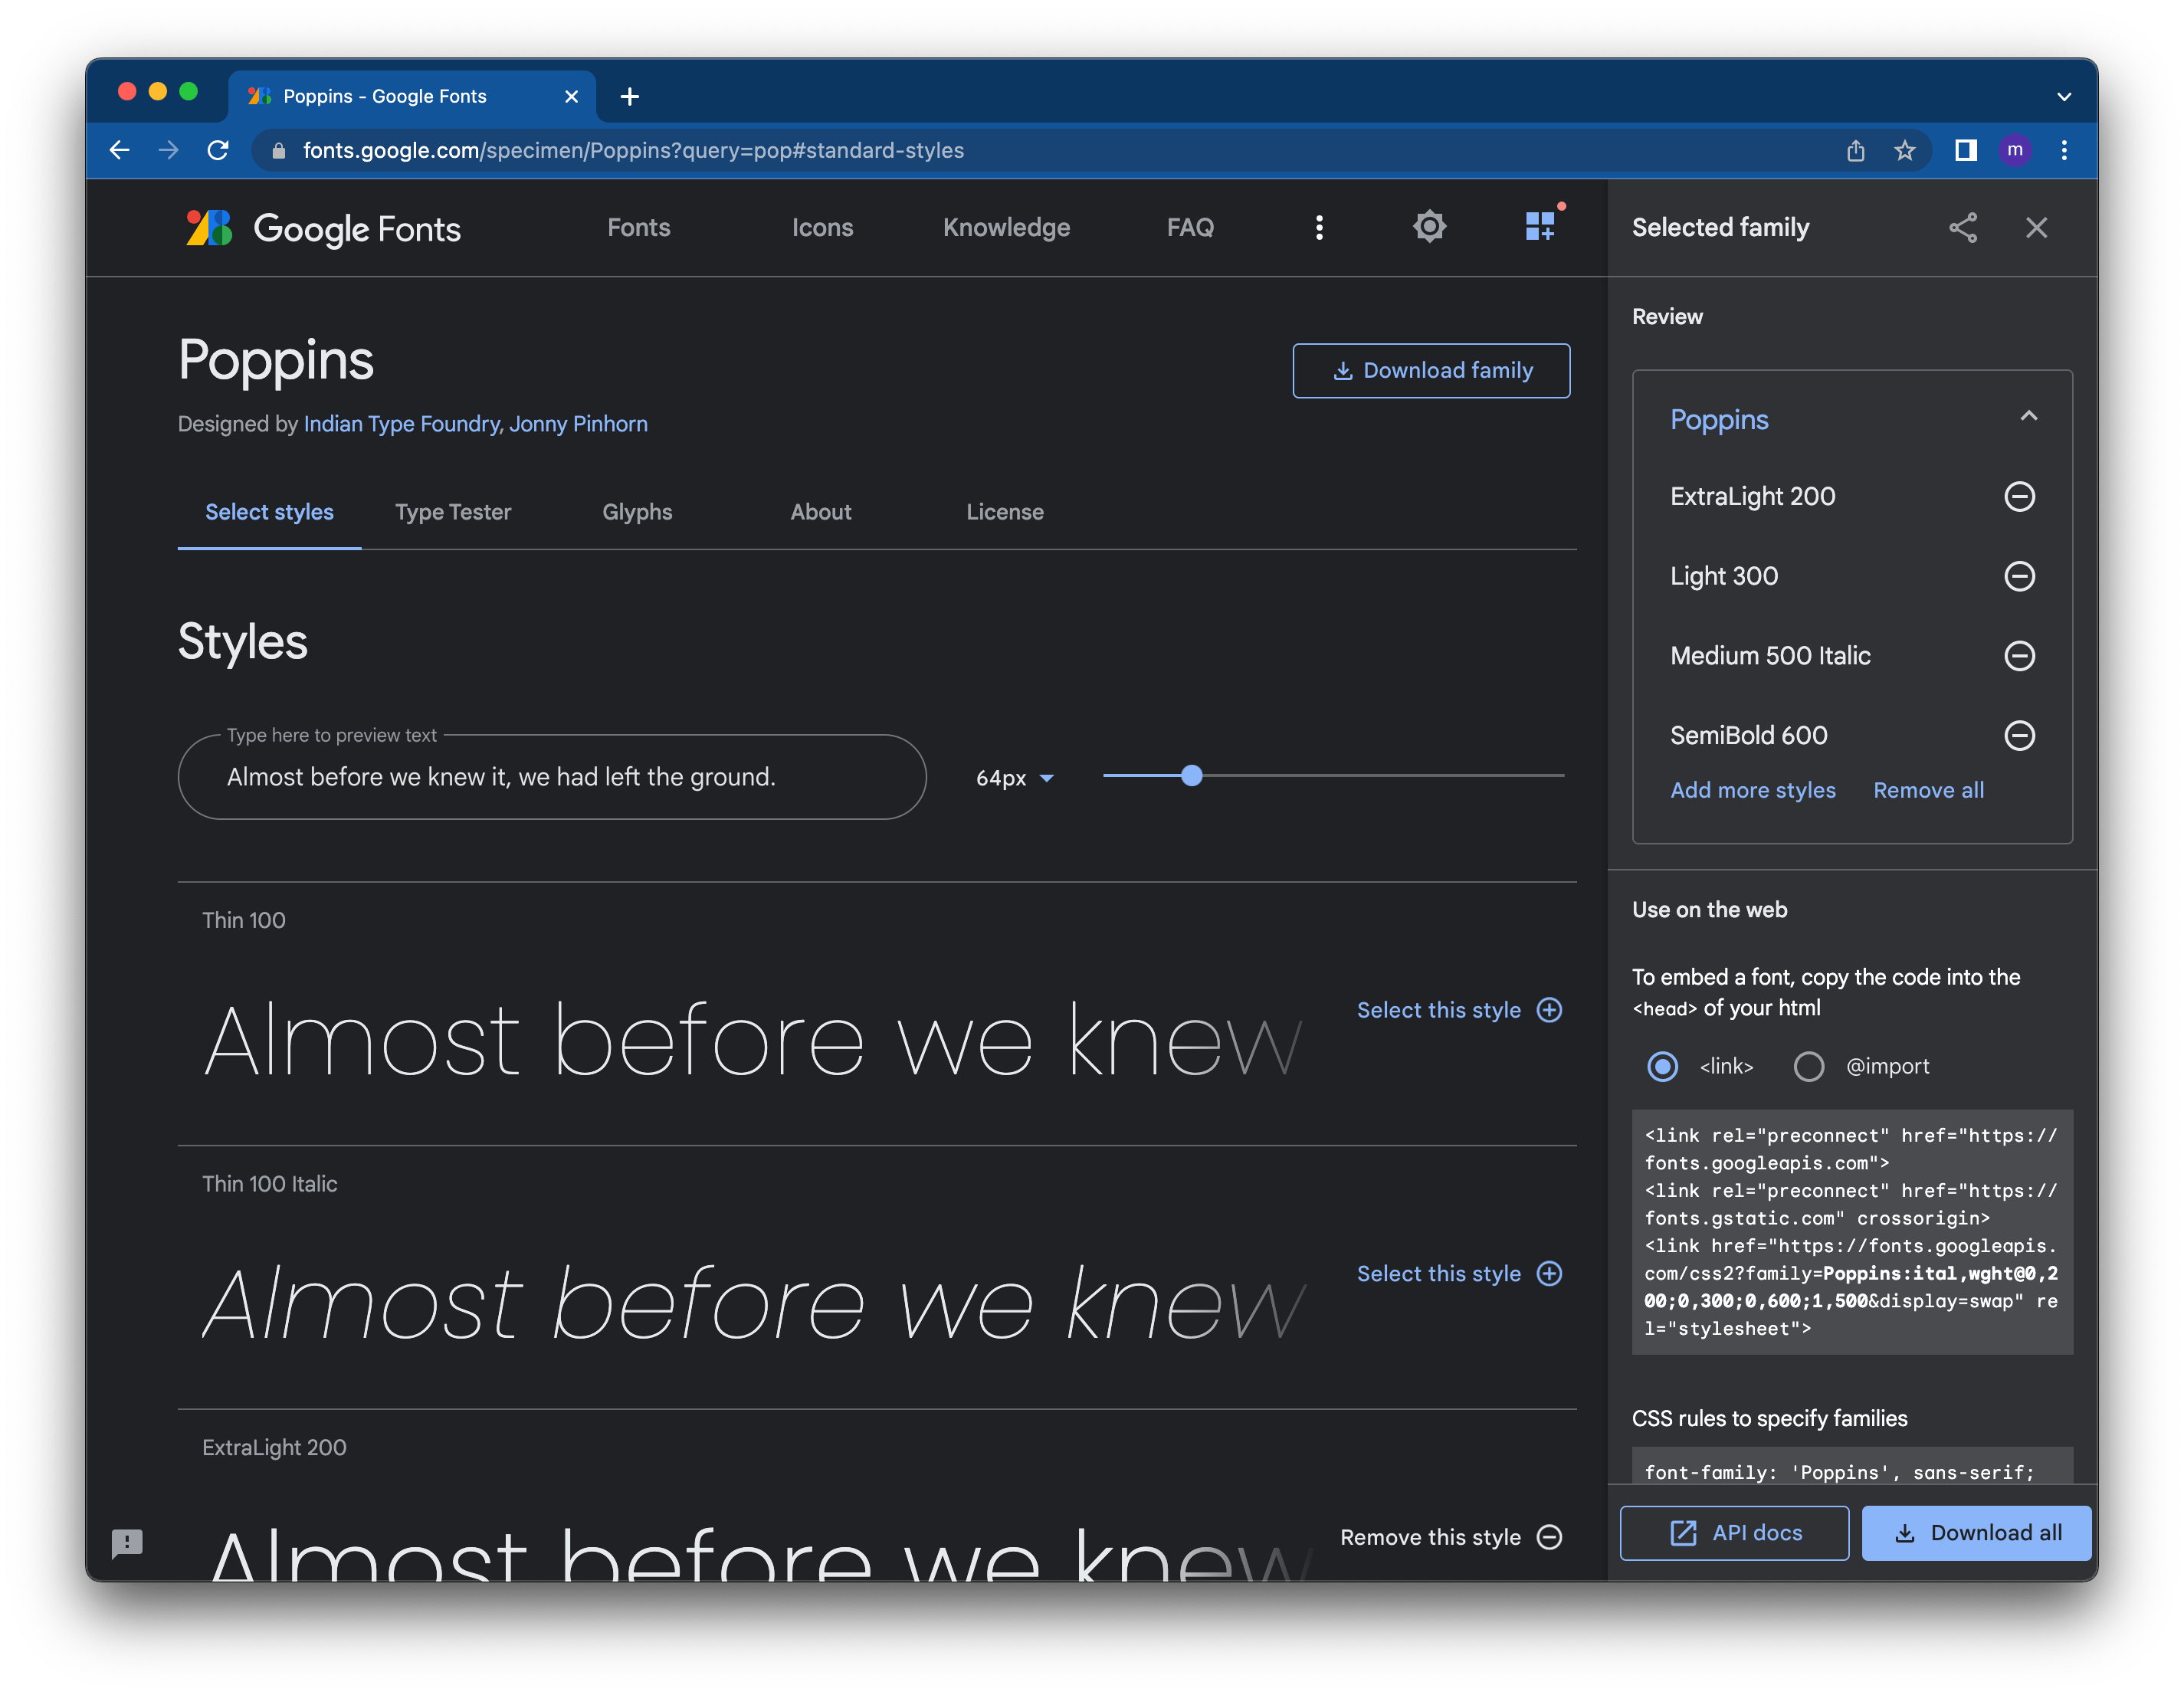
- Then you will select the Inter and Allura fonts using the same method. I mentioned earlier that Google font allows us to select multiple fonts.
To select the second and third fonts
- On the Menu bar, select the
Fontsmenu, this will bring out the search bar again. You can search for Inter font. - On the Sidebar, copy the generated link and add it to your
<head>or the import code to your<style>tag.
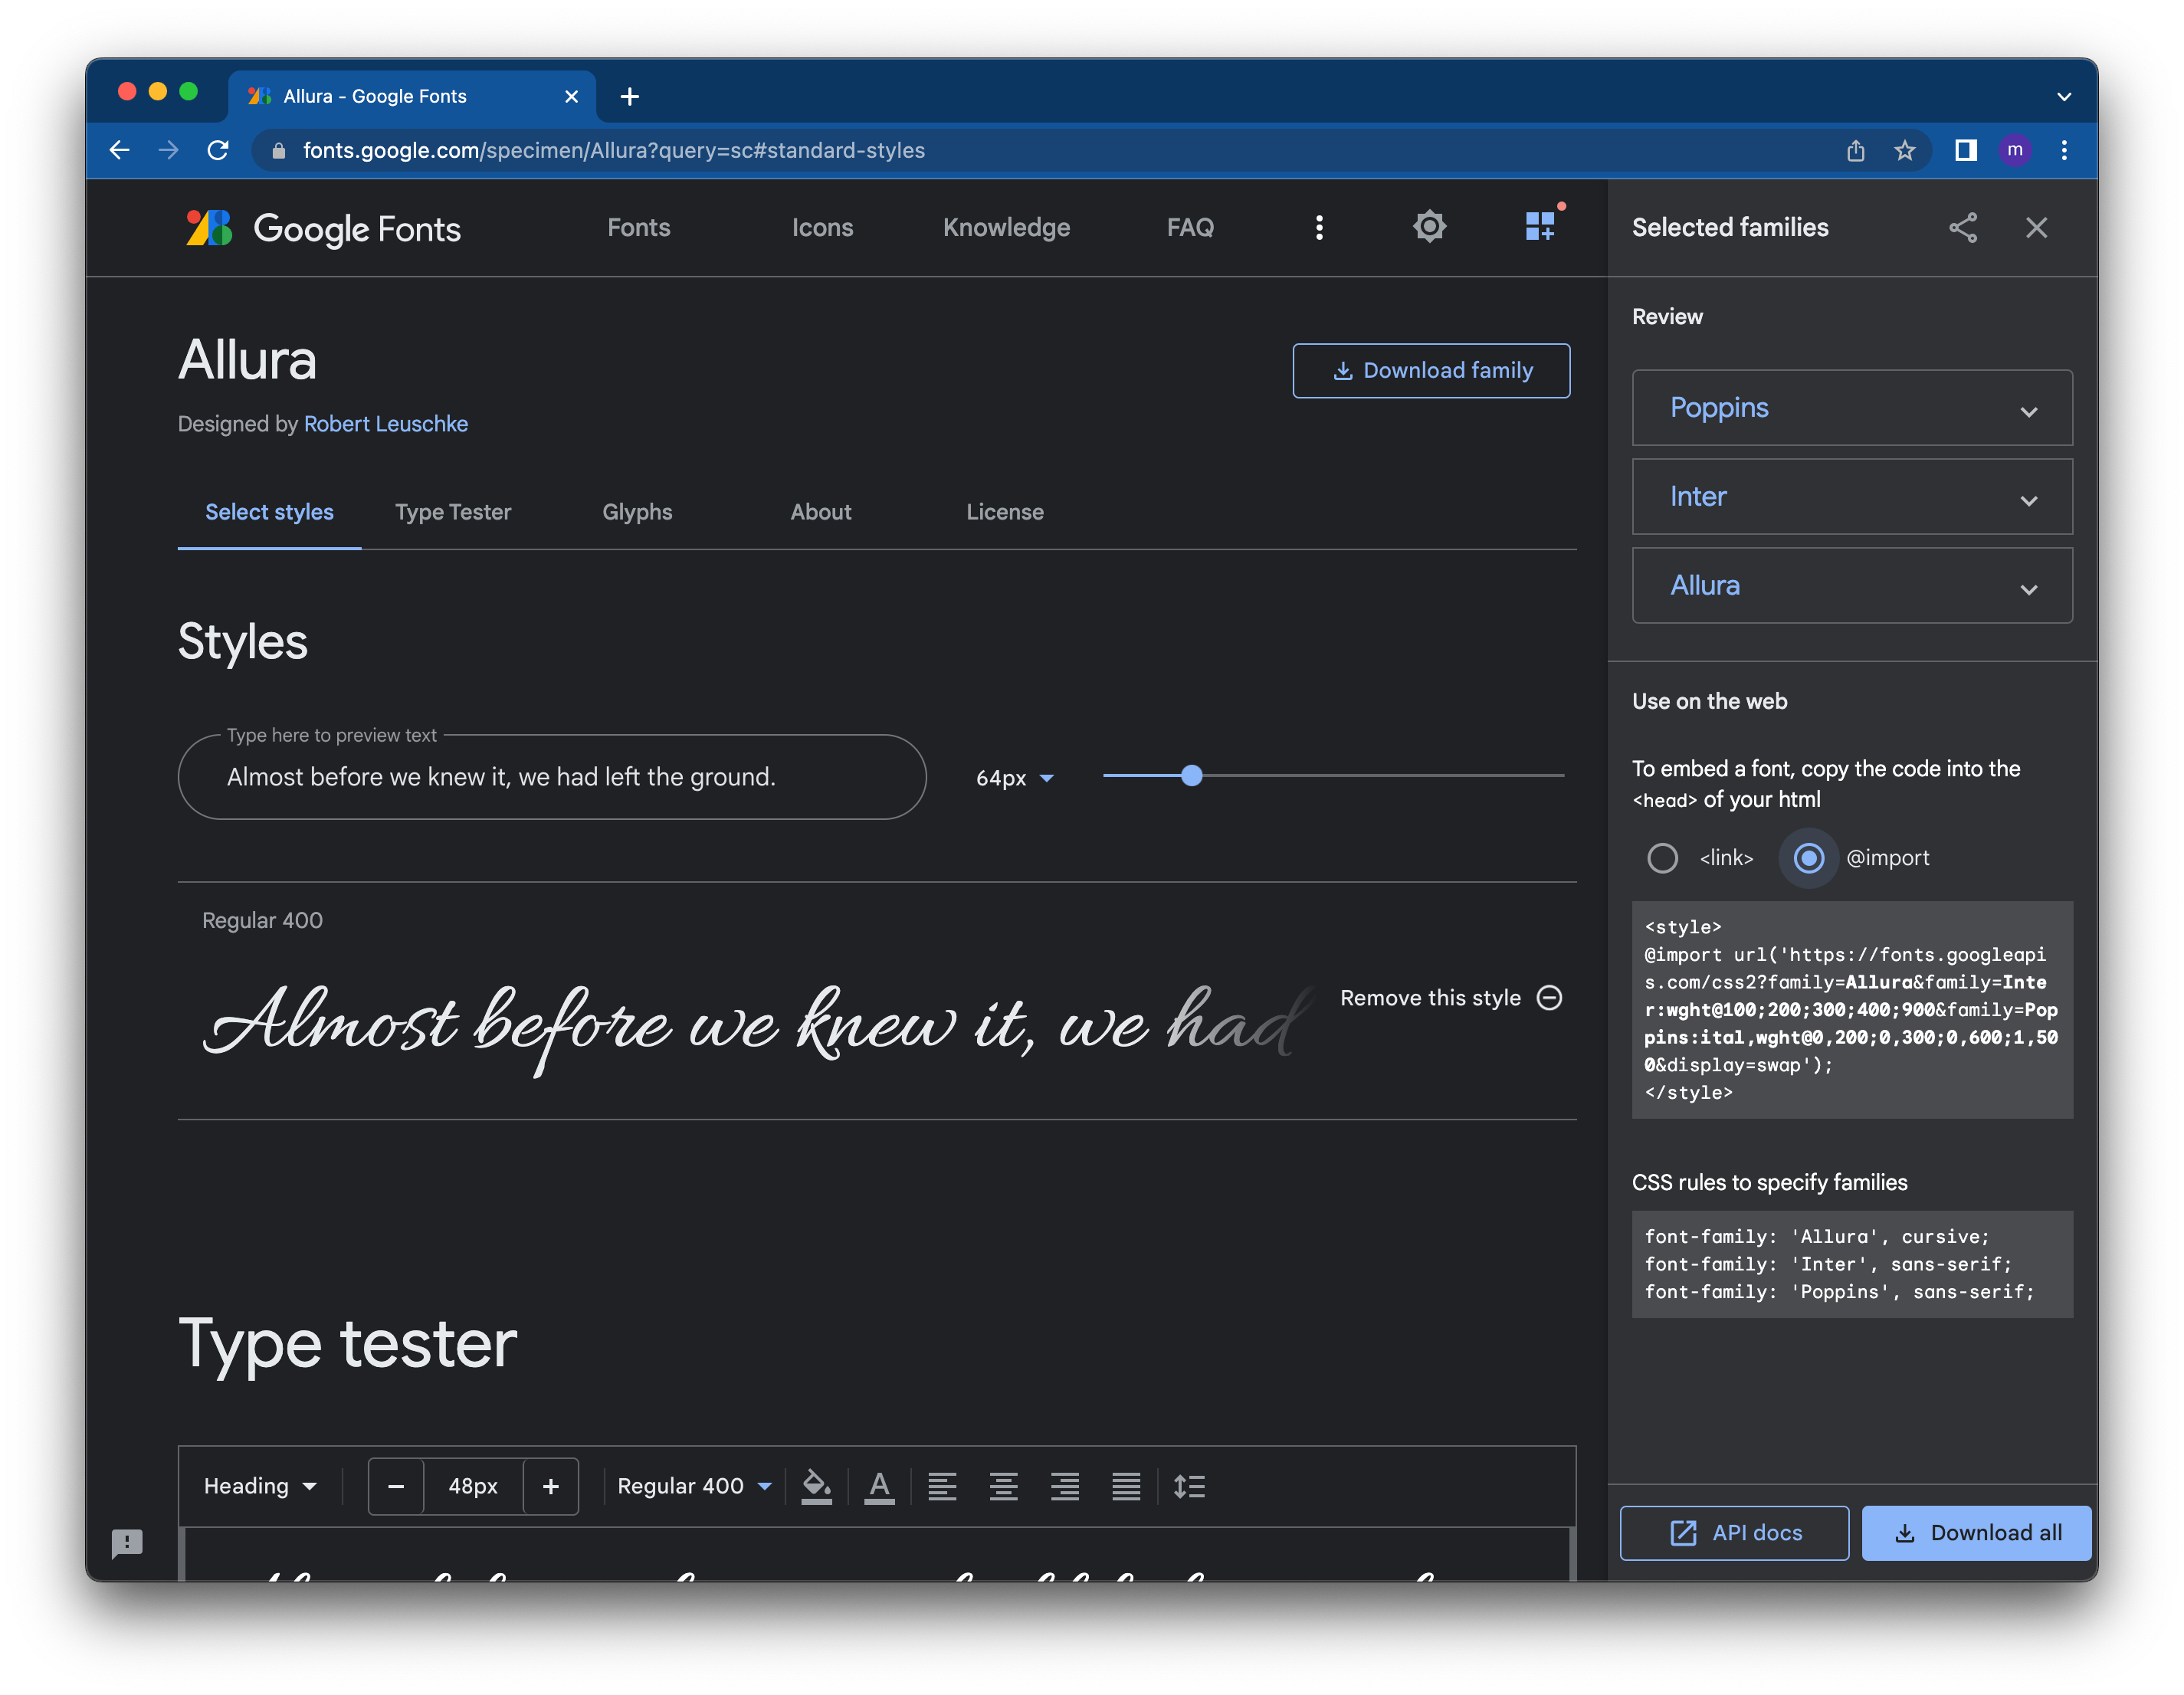
With this done, the imported fonts are available on your project and can be used anywhere in the project.
Now that the imported fonts are available in the project. You have different options to use the fonts.
As a CSS code
p {
  font-family: Poppins;
}
As a TailwindCSS arbitrary value
<p class="font-[poppins]">Lorem ipsum dolor sit amet, consectetur</p>
<p class="font-[inter]">Lorem ipsum dolor sit amet, consectetur</p>
<p class="font-[allura]">Lorem ipsum dolor sit amet, consectetur</p>
As a TailwindCSS utility class.
To achieve this, there are 2 ways to go about it.
- We extend the style, this means, both tailwind default fonts and our defined fonts will be available in the project.
You can extend the font like this:
const defaultTheme = require('tailwindcss/defaultTheme')

module.exports = {
  theme: {
    extend: {
      fontFamily: {
        'sans': ['Proxima Nova', ...defaultTheme.fontFamily.sans],
        'poppins': ["Poppins", "sans-serif"],
         'inter': ["Inter", "sans-serif"],
         'allura': ["Allura", "sans-serif"]
      },
    }
  }
}
- Overwrite default TailwindCSS fonts. If you don't want Tailwind CSS default font family to be available in the project, you can overwrite the default font family by designing the styles in the
theme: { }bracket instead of theextend: { }.
const defaultTheme = require('tailwindcss/defaultTheme')

module.exports = {
  theme: {
    fontFamily: {
        'sans': ['Proxima Nova', ...defaultTheme.fontFamily.sans],
        'poppins': ["Poppins", "sans-serif"],
         'inter': ["Inter", "sans-serif"],
         'allura': ["Allura", "sans-serif"]
      },
   }
}
With these defined fonts, you can use the font utility class anywhere in our project.
<p class="font-inter">Lorem ipsum dolor sit amet, consectetur</p>
<p class="font-poppins">Lorem ipsum dolor sit amet, consectetur</p>
<p class="font-allura">Lorem ipsum dolor sit amet, consectetur</p>
Conclusion Custom font families are common in web development because not all fonts are available on our computers nor on the google font platform. With this guide, you can now define custom fonts in a project.
